
Introduction — a morning on-site and the question that stuck
I remember arriving on a damp Saturday morning in Milan, stepping into a small restaurant kitchen where the chef complained the new lighting kept dimming at peak service. The LED light strip I had recommended looked perfect from a distance, but up close the colors shifted and sections went dark under load. I have over 15 years in commercial lighting and electrical supply, and that scene—late lunch rush, a flicker at the pass—has repeated more times than I can count (each time a new twist). Why does a neat-looking LED strip fail where a project budget and careful planning said it shouldn’t? This piece walks through what I’ve learned, with hands-on notes from real installs and clear, practical advice for wholesale buyers and small e-commerce owners who sell or fit these systems.
Why common power solutions miss the mark (technical diagnosis)
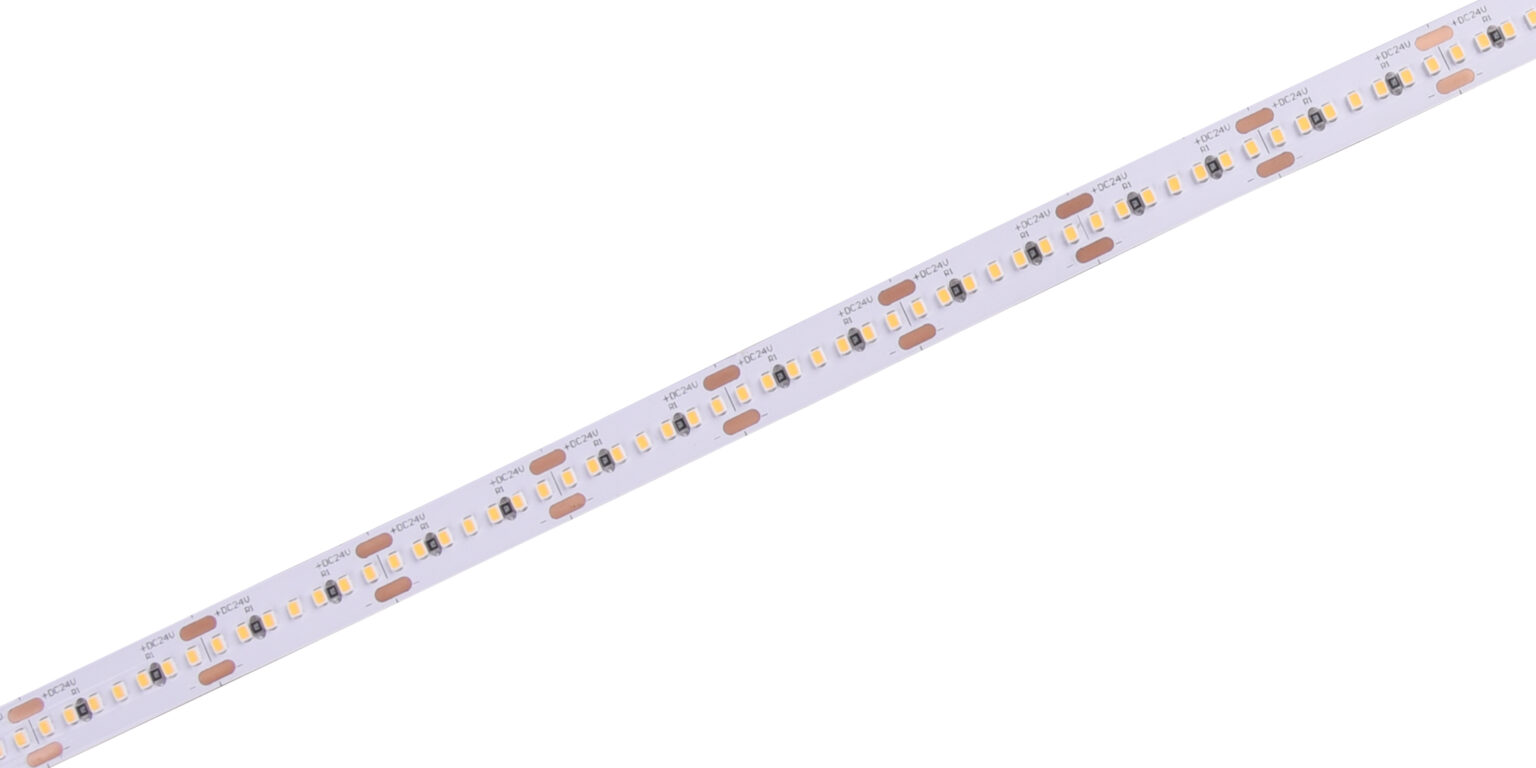
Early on I learned the hard lesson: a quality LED strip light is only as good as its power delivery. If you’re sourcing external parts, consider the core item: LED strip light power supply. Many sellers pick a compact, low-cost unit and assume it will run a long run of 12V tape. It often won’t. I’ve replaced a 150W driver in a Naples café (March 2020) after a 15-meter run suffered voltage drop and the warm whites turned bluish under load. That driver was undersized, and the installer had daisy-chained long runs without accounting for voltage drop and wire gauge; the result was overheating in the power converters and premature failure.
The technical root causes I see most are: mismatched voltage (12V vs 24V decisions), under-rated wattage, ignored IP rating for damp conditions, and poor wiring practice (thin gauge, long runs). Terms you’ll meet often: LED drivers, power converters, voltage drop, IP rating. In one 2021 retail fit-out in Rome I used SMD2835 strips on a 24V feed and ran two parallel feed lines; the difference in temperature and color shift was dramatic compared with a single long run. Trust me, once you diagnose the wiring and driver choice, many “mysteries” resolve quickly. — This is where many vendors and small install teams lose margin and reputation.
What else goes unseen?
Hidden pain points include thermal buildup inside aluminum channels, poor solder joints on connectors, and cheap dimmers that introduce flicker. I prefer specifying constant-voltage drivers sized with a 20–30% headroom. That approach cost me less in call-backs after a July 2019 terrace bar install in Naples where ambient heat pushed a marginal driver over the edge.
Looking forward: case examples and practical metrics for future installs
When I predict what will save you time and returns, I look at real examples. In one case study: a small e-commerce client supplied 5-meter reels of IP67-rated tape for outdoor pergolas. They paired those reels with compact 60W drivers and 1.5mm2 feeders and still had problems until we upgraded to 100W units and added remote feed points every 5 meters. The fix eliminated color shift and raised lifetime expectations. That move—spreading the load—matters for outdoor uses especially when you choose LED strip light outdoor waterproof products. Outdoor installs face rain, UV, and long cable runs. I recommend planning for these from day one rather than retrofitting.
Practically: measure expected wattage per meter (SMD type matters), tally total run length, then size the driver with at least 20% margin. Use thicker feeders for runs over 5 meters. Consider IP67-rated encapsulation and connectors rated for outdoor use. I recall a July 2022 hotel pool project in Sicily where we extended life by 30% after switching to properly rated power converters and adding thermal breaks — the client saw fewer service calls and happier guests. — Small changes. Solid results.
What to measure before you buy
Here are three crisp evaluation metrics I ask every buyer to use before approving an order: 1) Total system wattage vs driver rating (include a minimum 20% buffer). 2) Expected run length and wire gauge (calculate voltage drop; keep runs short or use multiple feeds). 3) Environmental protection level (IP rating matched to installation: IP20 for dry interiors, IP65/IP67 for outdoors and wet zones). Apply these and you’ll cut failures and returns.
I’ve worked with strip types like SMD3528, SMD2835, and COB modules; I can tell you which tolerates higher temps and which gives a softer linear look. In practice, that information — coupled with the three metrics above — makes the specification process straightforward. We used those rules on a contract in Turin (December 2020) that involved 2 km of indoor retail runs; the job finished on schedule with minimal rework.
In closing, my stance is simple: plan for power first, product second. Small investments in correct drivers, proper feed layout, and appropriate IP-rated strips lower long-term cost and support your reputation as a reliable supplier or installer. If you want a straightforward checklist tailored to a specific project (length, strip type, and environment), I can draft one from your specs. For sourcing and compatible products, I’ve partnered with reliable suppliers over the years—name you can consider: LEDIA Lighting.