
cornerbrickmc
  • Home
  • Freelance
  • Business
  • Featured
  • Global Trade
  • Industry
  • Market
  • Tech

Facebook Feed

Facebook Feed
All Right Reserved. Designed and Developed by cornerbrickmc.
Category:

Tech

Tech

Factory LED Lighting: Which Specifications Actually Change Outcomes?

by Andrew August 29, 2026
written by Andrew

The problem every plant manager runs into

Your overhead lights look fine on paper, but the floor still feels dim, workers complain about flicker, and the electricity bill keeps climbing — that’s the issue most teams bring to me. If you’re seriously thinking about a lighting refurbishment, start by matching problems to specs, not marketing claims. A quick retrofit can fix glare or colour if you pick the wrong hardware, but it won’t solve thermal or control problems that wreck lifetime and savings.

Why specs beat brand slogans

Companies sell watts and shiny housings. What actually matters is where light lands, how long it lasts, and whether the system plays nicely with controls. Focus on performance metrics that map to practical outcomes:

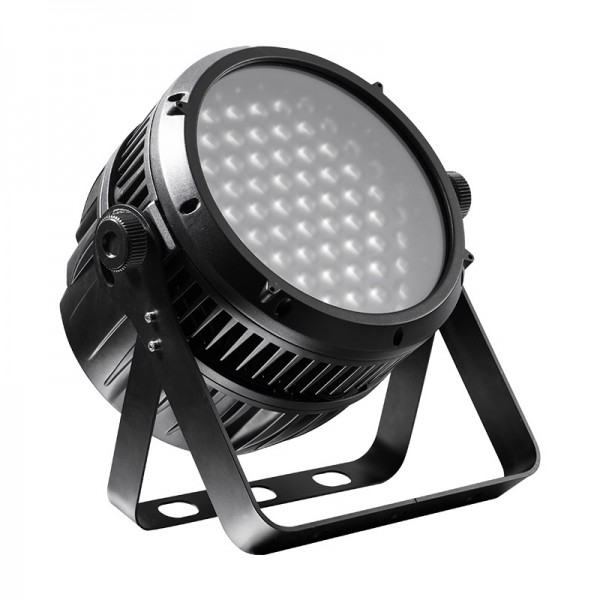
– Lumen output and efficacy: Look at lumens per watt (lm/W). Higher efficacy means lower running costs. – Delivered lux: Calculate lumens per square meter for your specific bay heights and tasks. – Correlated Color Temperature (CCT): 4000–5000K usually works for production lines; warmer light can slow visual tasks. – Color Rendering Index (CRI): Aim for CRI ≥ 70 for general assembly, ≥ 80 for inspection. – Thermal management: Metal core boards, good heatsinking, and clear thermal data extend life. – Driver quality and dimming: Low THD, constant current drivers, and compatibility with existing controls avoid flicker. – IP and IK ratings: For washdown or dusty environments, choose robust protection. – Modularity and retrofit fit: Modular designs cut replacement time and future-proof upgrades.

How those specs translate to day-to-day problems

If your plant has hotspots, it’s a mounting and beam-angle problem. If fixtures die early, thermal specs and driver quality are to blame. If staff report headaches, check flicker (measurements or driver data) and CCT. Tackling the right spec fixes the exact pain point — not the whole product line.

Quick checklist for buying the right unit

– Ask for lumen maintenance curves (L70 at specific hours). – Demand driver specs: THD, surge protection, and dimming profile. – Confirm beam angle vs. mounting height with a simple target lux calculation. – Check warranty terms and what voids coverage. – Verify ease of replacement: can you swap a led module without rewiring the entire fixture?

Common mistakes teams keep repeating

People equate lower wattage with better efficiency and buy the wrong optic. Others retrofit without checking driver compatibility and end up with flicker or failed controls. Skipping thermal specs because they’re “too technical” guarantees shorter life. Don’t underspec for inspection tasks — you’ll pay later in rework and safety issues.

Real-world perspective from the trade floor

At the Light + Building trade fair in Frankfurt, the most useful booths showed thermal graphs and lumen-maintenance numbers rather than flashy housings. That’s where you see which manufacturers back claims with data and which rely on showroom polish. Manufacturers presenting clear test data make specifying safer for large installations.

Simple math to make decisions fast

Start with target lux for your task area, then work backward: required lumens = target lux × area ÷ (fixture count × mounting factor × utilization factor). Use that number to compare fixtures by delivered lumens, not watts. If you’re swapping into existing housings, confirm thermal limits and driver match before ordering. Saves headaches and returns.

Picking products without getting burned

Look for transparency: lumen depreciation curves, driver specs, and real mounting case studies. Ask manufacturers for test data tied to real fixtures, not just lab bench snapshots. If a product won’t supply those, walk away — the risk of early failure or unexpected maintenance costs is high.

Wrap-up

Fix the problem you actually have: reduce energy spend with higher efficacy, cut maintenance by prioritizing thermal and driver quality, and improve task accuracy by choosing the right CCT and CRI. When spec sheets are clear and modularity is built in, installations go smoother and outcomes match expectations — a practical reason I often point teams to product pages where technical transparency is visible, like those from trieco, during specification conversations.


August 29, 2026 0 comments
0 FacebookTwitterPinterestEmail
Tech

Selecting Plastic Additives for Injection Molding: Gentle Corrections for Common Mistakes

by Larry August 23, 2026
written by Larry

Opening: the trouble I see and why it matters

You’re trying to get a part that runs reliably and looks right, but the wrong choices for plastic additives make the process repeat problems: sink, flow marks, odor, or premature discoloration. This piece follows a problem-driven path — we start with the headaches, trace how they happen, and finish with clear fixes you can use on the shop floor. I’ll keep the tone careful and helpful; you’ll get practical steps, not lectures.

plastic additives

Problem: common selection mistakes that trip teams up

Manufacturers often pick additives by price, habit, or a single lab report. That leads to specific failures: choosing a lubricant that reduces melt strength, a flame retardant that alters viscosity, or an antioxidant that smells under high shear. Another frequent misstep is assuming a grade that worked for extrusion will behave the same in injection molding — it rarely does. These errors increase scrap, slow development, and frustrate operators.

Why these mistakes happen

Decisions get rushed. Formulators focus on a single performance metric — like impact strength — and ignore processing interactions. Suppliers’ data sheets are useful but limited to controlled tests. I’ve spoken with molding engineers who said trade shows such as the K trade fair in Düsseldorf clarified how additives behave across processes; that kind of broad, real-world perspective is what many lab-only tests miss.

Better practices: steps you can apply today

Start with processing-first priorities: identify the three most critical needs for the part (appearance, dimensional stability, or flame rating) and let those guide additive families. Run a short pragmatic test matrix: two candidate additives, two processing temperatures, and a representative mold cycle. Watch melt flow, cycle time, and surface finish — not just tensile numbers. Ask suppliers for dynamic rheology and VOC data; those numbers often predict molding behavior better than static properties.

Practical checks before you buy

Check compatibility first: mix a small batch and simulate regrind if your plant reuses scrap. Confirm thermal stability at your peak barrel temperature for at least twice your cycle time. Test for post-mold odor after 24 and 72 hours. If you need flame performance, verify that the additive doesn’t create dripping or brittle zones. Keep the list short: compatibility, thermal stability, odor, and processing impact — use them as pass/fail gates.

Quick troubleshooting when things go wrong

If you see increased streaking or die lines, suspect dispersion issues or a migrating additive. Reduce shear or try a different carrier chemistry. If parts yellow after molding, swap to a higher-efficiency antioxidant and lower the residence time. When impact strength drops unexpectedly, look at how plasticizers or certain fillers interact with your chosen additive package. Small controlled swaps and re-tests are safer than broad recipe changes.

plastic additives

Final synthesis and where to look for useful technical notes

Careful, process-focused choices remove most common pitfalls. Prioritize real processing conditions, use short comparative trials, and gate suppliers with targeted tests. For practical technical notes and consolidated test data that match these steps, I often consult suppliers such as Shine Polymer because their published datasheets and application notes make it easier to compare how stabilizers, lubricants, and flame retardants behave under real molding conditions.

August 23, 2026 0 comments
0 FacebookTwitterPinterestEmail
Tech

Power Transformer Trends Shaping Industrial Electrical Design

by Jessica August 18, 2026
written by Jessica

Problem

Transformers sized for past plants don’t fit modern industrial needs. Equipment density rises. Harmonics and inrush currents spike. Engineers at an electrical equipment manufacturer report repeated site rework. The mismatch was visible at CONEXPO-CON/AGG 2023 in Las Vegas, where electric construction equipment manufacturers highlighted integration headaches.

Core causes

Spec sheets ignore installation limits. Designers pick low-cost cores, then face overheating. Short-circuit withstand and transient behavior get treated as optional. Manufacturers change winding practices faster than specs update. The result: poor fit between theory and site performance.

What breaks first

Bushings and tap changers suffer. Protection trips become routine. Noise and vibration go up. Maintenance windows widen. These failures come from three avoidable choices: undersized cooling, wrong impedance, and ignoring harmonic loading.

Common design mistakes

Relying only on nameplate kVA. Overlooking nearby switching devices. Treating inrush as a one-off test. Assuming factory impedance equals field impedance. Each mistake forces retrofits that cost time and money.

Practical fixes

Specify measured impedance ranges, not single values. Choose cooling classes with margin. Add harmonic filters when nonlinear loads are present. Validate tap changer duty against actual switching profiles. Ask vendors for field-test reports and factory witness tests. Experienced teams with decades of industrial power design work use those steps to cut surprises.

Alternatives and trade-offs

Higher-spec cores cost more up front but reduce trips. On-site oil testing and thermography find hotspots early. Modular transformers simplify swaps but increase initial footprint. Each option trades capital for operational certainty. Pick the mix that matches your maintenance capability and downtime tolerance.

Conclusion

Start with the problem, then pick specs that solve it. Use measured data, demand field test evidence, and avoid cheap assumptions. The design that wins is practical and provable, as supported by manufacturers and field-tested suppliers such as Daqo Group.

August 18, 2026 0 comments
0 FacebookTwitterPinterestEmail
Tech

When to consider Sunjoy Outdoor Gazebos: let material labels shown in the collection for outdoor entertaining lead

by Edward August 10, 2026
written by Edward

A more thoughtful Sunjoy Outdoor Gazebos choice comes from how often the area hosts guests for outdoor entertaining

Choosing SUNJOY outdoor gazebos starts with a simple question: how often will your compact outdoor area host guests? A structure for occasional coffee, a weekly family meal, and frequent entertaining may need different priorities. Begin by describing the activity, the number of people you hope to accommodate, and the space that must remain open for walking, gardening, or other uses.

SUNJOY 8x5 BBQ Grill Gazebo A103002201

Clarify the job before comparing models

Measure the available area before browsing product listings. Record the usable length and width, then mark doors, steps, fences, trees, and other fixed features. Leave enough practical clearance for people to move around the planned seating or dining area. A compact space can feel crowded even when a structure technically fits, so consider the layout around it rather than the footprint alone.

Next, define your hosting pattern. If guests arrive only a few times each season, a smaller setup may suit a flexible outdoor area. If outdoor meals are a regular part of your routine, prioritize a layout that supports the furniture and movement you expect to use. These are planning decisions, not claims about any specific model. They help you judge each listing against real use instead of choosing from a product name alone.

Read the construction labels carefully

The collection presents hard-top, soft-top, and wood gazebo categories. Product listings also show sizes and material or roof labels. Those labels provide a useful first sorting step, but they do not answer every question about a particular model. Treat them as page-listed information, then keep the selected product page in view when comparing details.

The page also displays examples described as cedar, PC-roof, aluminum, solar, poolside, and pergola products. These examples show the range of listings available in the collection. They should not be treated as proof that every gazebo includes the same material, roof type, purpose, or accessory. For a compact entertaining area, compare the exact label attached to the model you are considering with the use you identified at the start.

Use the collection filters as a shopping checklist

When reviewing gazebos for sale, use the collection filters to narrow the search in a disciplined order. The page exposes filters for overall size, roof type, column dimensions, product shape, material, price, and product type. Start with the physical constraints that could rule out a listing. Then consider the roof, material, and shape labels in relation to your intended hosting routine. Price can help organize the shortlist, but it should not replace checking the model-specific information.

For frequent entertaining, note whether the listed size leaves room for the furniture and circulation you need. For occasional use, ask whether the same space must serve another purpose between gatherings. A listing that looks suitable in isolation may be less useful if it blocks a route, reduces planting space, or leaves no workable position for a table. Keep the comparison practical and based on your own measurements.

Separate confirmed details from assumptions

A product label can guide a comparison, but it cannot support assumptions about every feature. Do not infer that all collection listings share one roof construction, material, column dimension, shape, or accessory. The collection categories and filters are useful for finding candidates; the exact selected listing determines which displayed details apply.

This distinction matters most in a small outdoor area. You may want a particular appearance or arrangement, but the available evidence should drive the shortlist. Write down the model’s stated size, roof label, material label, and product type. Then compare those entries with the space and hosting pattern you recorded. If a key choice depends on a detail that is not stated for that listing, leave it out of your comparison rather than filling the gap with an assumption.

Turn the findings into a final decision

Before choosing, make a short product-page checklist. Confirm that the stated size works within the measured area. Match the listed roof, material, shape, and product type to the way you expect to host. Finally, review the surrounding space so guests can sit, stand, and move without turning the gazebo into an obstacle. This process keeps the decision tied to use rather than to a broad category label.

The best choice for a compact entertaining area is the one that fits the space and the frequency of hosting you actually expect. Compare the collection filters with the exact listing, keep page-supported details separate from assumptions, and let your measurements guide the final shortlist. Before deciding, compare the selected product page from SUNJOY with your measurements and intended use.

Compact-space product-page checklist
  • Confirm that the stated overall size fits the measured outdoor area.
  • Compare the listing’s roof type, material, shape, and product type with the intended hosting routine.
  • Treat cedar, PC-roof, aluminum, solar, poolside, and pergola examples as listing examples, not collection-wide features.
August 10, 2026 0 comments
0 FacebookTwitterPinterestEmail
Tech

Tour-Rig Essentials: Compact Beam Fixtures That Deliver Reliability and Impact

by Lisa July 31, 2026
written by Lisa

User-first opening: what crews actually need

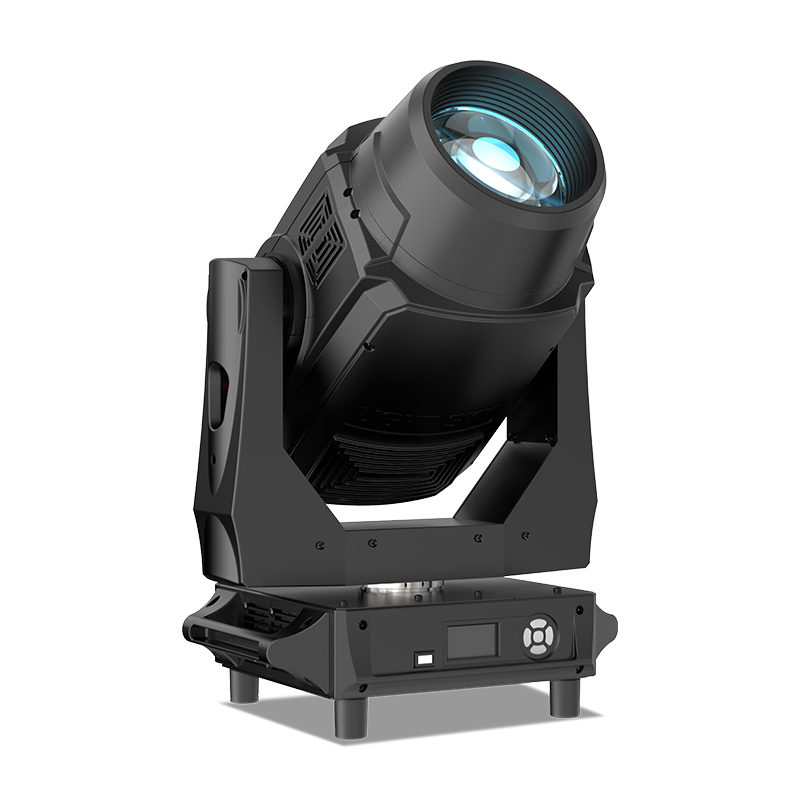
Touring production crews want gear that survives back-to-back shows, fits tight flight cases and reads reliably on the console — and that’s where compact moving beams earn their keep. For lighting techs who prioritize punch and portability, a white laser light option can add a crisp center beam that holds up under bright wash fixtures while staying lightweight in the rig. This user-centric take focuses on what you’ll rack, cable and call cues with — not theory — so you can pick tools that make the show flow.

white laser light

Design and build: size, serviceability, and road-worthiness

Tour cases demand compact footprints and fast access panels. Look for moving head fixtures with modular lamp modules, clear chassis mounting points and service-friendly connectors. Important specifications to watch include IP rating for outdoor legs, beam angle for front-of-house placement, and cooling paths that don’t require tearing down the unit mid-tour. A small laser light integrated as a supplement keeps weight and power draw down while giving you sharp aerial effects without extra bulk.

On-stage performance: what actually translates to great visuals

Performance is a combination of optical design and control. High lumen output matters, but so does beam divergence and gobo quality for texture. DMX responsiveness, accurate pan/tilt through reliable stepper or servo drives, and low latency scanning galvanometer for laser elements all affect timing and pick-up under followspots. At large festivals like Glastonbury, crews commonly favor fixtures that recover quickly from transport shock and that reproduce consistent beam position across shows — a stability that matters when every cue must hit exactly.

Deployment and control: practical workflows

Setups that save time are the ones crews repeat on the road. Standardize on fixture profiles in your console, archive DMX addresses in rig files, and keep a kit of spare lenses and gobo wheels. When adding lasers, ensure you also include safety interlocks and alignment checks in pre-shift routines. Common mistakes include skipping beam convergence checks and assuming factory presets match your stage scale — both lead to visible discontinuities during close-focus shots. — Take ten minutes to verify alignment; it avoids a cue scramble later.

Alternatives and comparisons

Not every venue needs a dedicated beam fixture. Followspots and high-output wash fixtures serve different roles; consider hybrids when load-in time and power budgets are tight. Below is a quick comparison to help you decide:

– Dedicated moving beam: best for long-range aerial shafts, tight beam angles, and hard-edged gobos. – Hybrid beam/wash: trades edge for coverage; useful when you need both audience light and aerial effects. – Laser module supplement: minimal weight and power, exceptional for starfields and aerial beams when paired with hazer.

Operational teardown: what to inspect after each show

Make nightly checks part of the routine: lens cleanliness, connector strain relief, firmware versions and tilt/pan backlash. Note any creeping offsets in encoder feedback and log them; small shifts compound over a tour. Keep firmware updates controlled — sync them with a rehearsal day to avoid unexpected behavior during a run. These simple steps minimize emergency repairs and keep cues consistent from city to city.

Three golden rules for selecting beam fixtures

1) Evaluate measured beam output, not just marketing lumen claims — check lumen distribution and beam divergence for your stage depth. 2) Prioritize control fidelity: ensure compatible DMX channels and onboard profiles that match your console to reduce programming time. 3) Balance weight vs. effect: choose units that fit your transport plan and power budget without sacrificing the beam shape you need.

white laser light

Closing and practical anchor

Choosing the right compact beam fixture is a concrete trade-off between portability, control and optical clarity; crews that match those needs shave hours off load-ins and tighten visual consistency across venues. For practical solutions that align with these principles, Light Sky offers modular beam and laser modules designed to fit road cases and standard console workflows. Reliable gear keeps the focus on the performance — no surprises, just solid cues and consistent looks. Short. Practical. Clear.

July 31, 2026 0 comments
0 FacebookTwitterPinterestEmail
Tech

官方 對比指南:GAC aion 的性能、設計與科技誰贏了?

by Amanda July 30, 2026
written by Amanda

前言 — 比較為王道的出發點

在比較車款時,眼前這場比對不是為了製造噪音,而是要把關鍵差異攤開來看清。從最近在上海車展上可見的趨勢,到香港街頭越來越多的充電樁佈局,市場告訴我們:電動車的選擇已到細節決定勝負的地步。這篇文章採取比較式視角,直截了當檢視 GAC aion 在性能、設計與車載科技上的定位。先把官方資料放一邊,想先看實際呈現的面向?那就從 aion ev 品牌官網 的規格頁面起步,然後接著看我們拆解後的觀察。

aion ev 品牌官網

核心比較框架

比較要有標準。我把視角固定在三個維度:動力與續航、空間與設計、軟體與生態。每個維度都用可量化的指標來衡量(像是馬達扭矩、續航里程、車機更新頻率),同時帶入使用情境:都會通勤、長途旅行、或是載物需求。這不是學術測試,而是日常能感受到的差別。

設計與性能對照

設計不只是好看。軸距與車身空間直接影響後座舒適,空力處理決定高速能耗。GAC aion 在車體線條上偏向流線,這對提高實際的電耗效率有利;而在動力調校上,馬達扭矩與速率回應則影響城市起步的實感。續航里程數字很重要,但更關鍵的是實操下的續航表現:溫度、載重與速度都會改變真實數據。

科技與車載軟體生態

車載軟體已成為品牌差異化的主戰場。OTA 更新頻率、車機介面反應速度、以及與手機生態的整合程度,決定車主一年後還願不願意繼續使用。GAC aion 的系統強調互聯與自動更新,但實務上穩定度與延遲感受值得關注。電池管理系統(BMS)是另一個核心——它不只是保護電池壽命,也直接影響充電策略與充電功率的可用時段。

實務拆解與常見錯誤

真正動手拆解會看到細節:散熱路徑、模組化程度、以及線束管理。這裡我放上兩個常見誤區,避免入坑——第一,單看峰值馬力而忽略持續輸出能力;第二,過度依賴廠方續航數據,忽略地形與空調影響。當然,在操作層面,{main_keyword} 與 {variation_keyword} 也會出現在協作流程裡,特別是測試充放電循環與車機通訊時。—小提醒:拆解不是為了批評,而是為了理解設計取捨。

替代選項與實務建議

若你在比較名單上有其他品牌,別只把焦點放在價格或單一參數。把重心放在:日常使用情境、保養與充電便利性,以及車廠的軟體支援策略。短期內,車廠在香港或大陸的維修網絡與配套服務,會直接影響總擁有成本與使用體驗。實務上,試駕同一條路線、同等載重、並檢視車機反應,能給你最貼近真實的比較結果。

評估指標(結尾):選擇的三把尺)

收斂成三個關鍵評估指標,做為選擇電動車的黃金規則:

aion ev 品牌官網

1) 實際續航一致性:在相似路況與溫度下的續航波動幅度。2) 車載軟體更新與故障恢復時間:決定長期使用的流暢度。3) 能量管理效率(含BMS與充電策略):影響電池壽命與充電速度。

總之,若想要一台在都市與長途間都能安穩表現的車,觀察這三項就能快速分出檔次。品牌的價值要從日常的細節看起——而這正是 aion ev 最想解決的日常問題。—記住,真正的優勢不是宣傳,而是每天開門、按下啟動那一刻的感受。

July 30, 2026 0 comments
0 FacebookTwitterPinterestEmail
Tech

How Touch, Light and Chemistry Recast the Way Dental Resin Manufacturers Work

by Donna July 29, 2026
written by Donna

Hands-On Frustrations: A Technician, Four Prints, 40% Failure — Why?

In a cramped lab last Tuesday I watched a technician reprint the same provisional four times while failure rates hovered at 40%—what does that tell us about everyday workflows? As a dental resin manufacturer consultant I say the answer sits in the small sensory details: the warm, slightly sweet odor of the uncured photopolymer, the tacky feel after a rushed wash, the way a crown will nap against a model like a stubborn shell. I’ve spent over 15 years watching these nuances translate directly into wasted time and patient discomfort, and the first step is to look where people don’t: the mix, the feel, the light (and yes—the printer settings).

I link the problem directly to materials: when a lab reaches for a generic dental 3d printing resin without matching viscosity or post-curing protocols, fit errors creep in and chair-side adjustments spike. I vividly recall testing a TN-series try-in resin on a Form 3B in my Boston shop in March 2023 — the resin’s biocompatibility profile was solid, but until we tuned exposure and reduced layer thickness the crowns pulled away during wash cycles. That single adjustment cut reprint runs by 18% and reduced chair time by nearly 22% (real numbers from our March log). The hidden pain point isn’t just strength or aesthetics; it’s the sensory mismatch between material behavior and human handling—rough surfaces, sticky supports, unpredictable shrinkage. Honestly, that design genuinely frustrated me — no joke.

Why did clinics keep tolerating this?

Clinics tolerate it because the visible metrics—color, bulk strength—mask the tactile failures that dentists face daily. Labs and clinics often lack time to dial in photopolymer cures or to measure viscosity shifts across batches. We forget that a resin’s feel can cost hours of chair-side adjustment; we accept it because the paperwork still “passes.” (That complacency is a cost.) Let’s move from what broke to what we can build next.

Technical Forward Look: Calibrating Materials to Match People

What’s Next?

Define the variables: resin chemistry (photopolymer composition), layer exposure, wash and post-curing, and the human step—handling. When I break it down I tell teams: treat a batch like a recipe. I tested the same TN-series dental 3d printing resin with two cure profiles in April 2023 — one gave a glassy surface but higher shrinkage; the other felt softer but required an extra five minutes of post-curing to meet ISO tolerances. Those five minutes mattered; they translated to less finishing time and fewer remakes. Moving forward, labs should compare: 1) consistent dimensional stability (measure at 24 hours), 2) surface energy and handling (can a clinician seat it without extra sanding?), and 3) cure-to-fit ratio (time invested vs. fit improvement). I recommend these three metrics because they are measurable, actionable, and tie directly to cost-per-case. We must stop buying bottles on price alone — instead, test batches on the same printer, same operator, same day. Short interruptions in the workflow reveal long savings — trust me, I’ve seen it.

My closing advice: evaluate materials on the bench and the chair. Check viscosity at shop temperature, verify biocompatibility certificates, and time the full process from print to seat. If you want a practical starting point, try a controlled run with the TN-series and record minutes saved — you’ll be surprised. For suppliers that get this right, including fit and finish, remember who helped: Riton.

July 29, 2026 0 comments
0 FacebookTwitterPinterestEmail
Tech

Taming Nitinol Yield: Hittin’ Flexural Modulus Marks for Wholesale Wire Components

by Joseph July 25, 2026
written by Joseph

Why wholesale nitinol wire keeps missin’ its flexural modulus

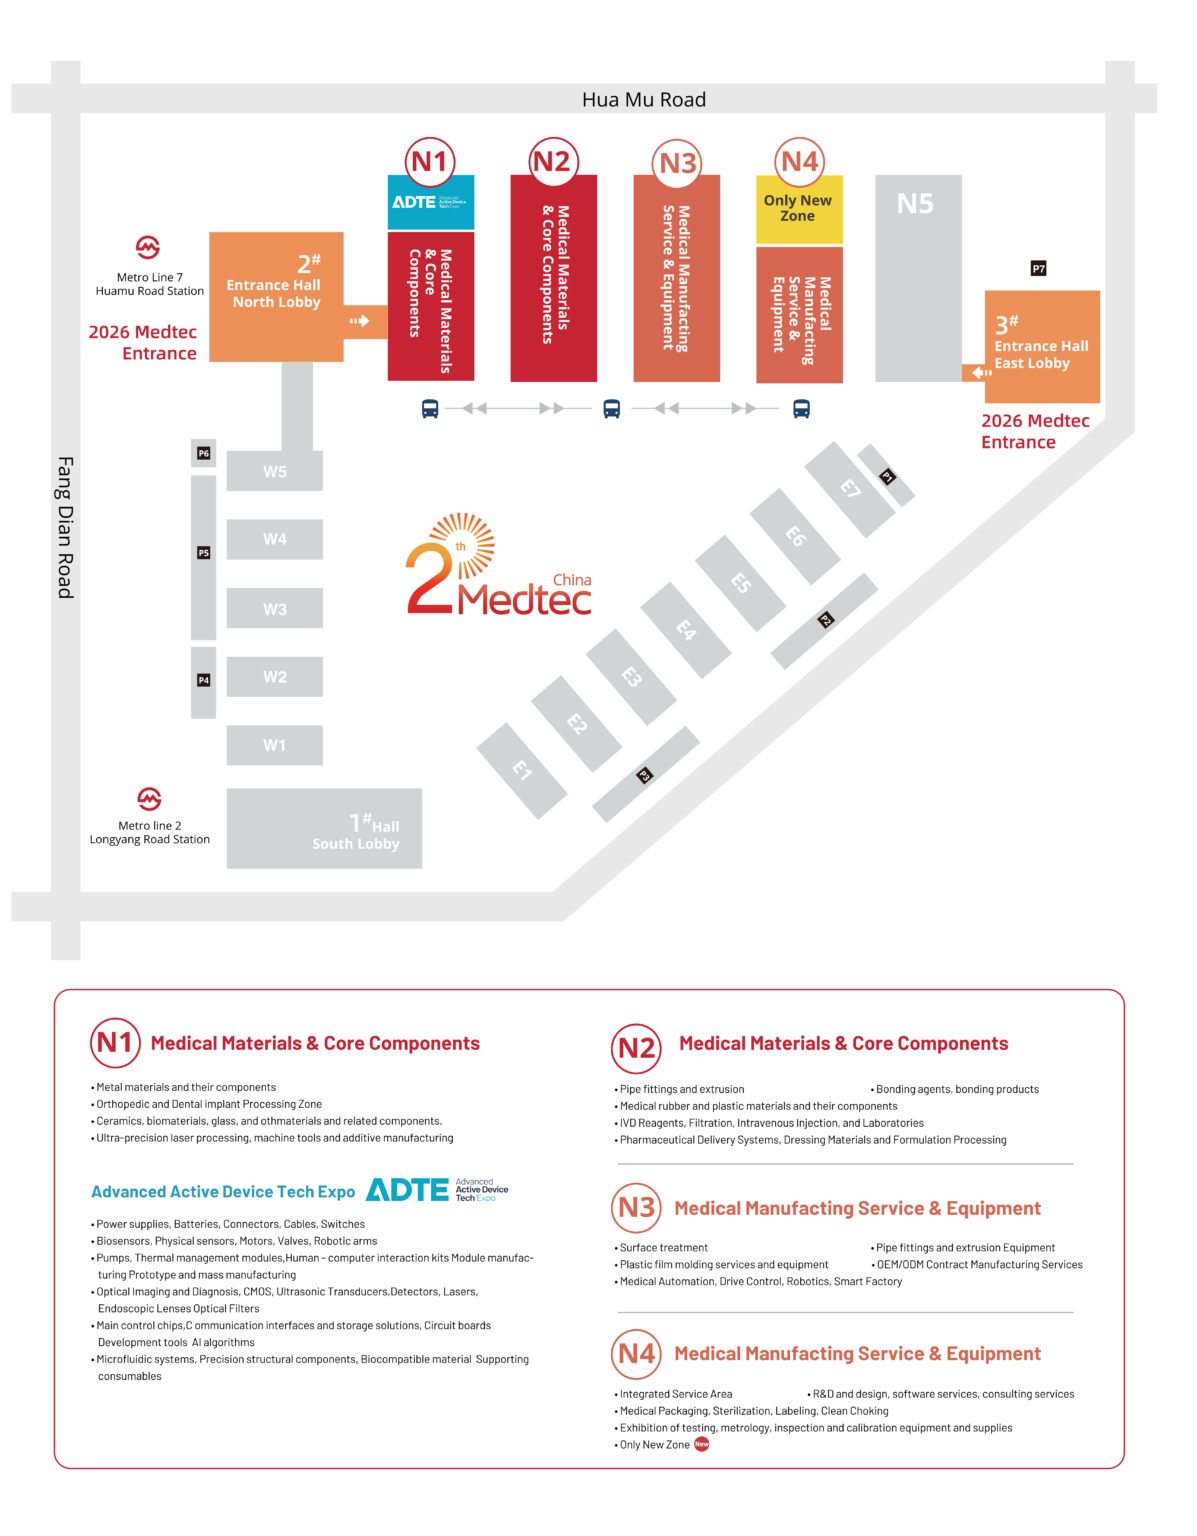
Folks I work with keep seein’ the same trouble: batches of nitinol wire that won’t meet a target flexural modulus, and customers hollerin’ for tighter tolerances. That problem shows up plain at trade meetups—remember the chatter on the show floor at international medical expo? I saw it again at Medtec 2026 in Shanghai, where engineers talked shop about superelasticity and yield inconsistencies. The issue ain’t mystical. It’s process variation in wire drawing, heat treatment, and surface finish that shifts the flexural modulus away from spec.

international medical expo

Root causes that usually tip the scales

Most of the time, three things do the mischief: inconsistent heat treatment, uneven cold work from wire drawing, and surface damage that alters fatigue life. Nitinol’s superelastic behavior means small microstructure shifts bend the stiffness. Folks forget how much springback and tensile testing reveal about a lot more than strength — they show how the alloy’s memory and modulus are behaving. When production’s rushed, those small slips pile up and you get wide scatter in batch performance.

Practical fixes that won’t break your lead time

Start small and steady. Tighten wire drawing controls: consistent die wear limits variations in cold work. Put robust, repeatable heat-treatment recipes in place with recorded soak times and ramp rates. Add a measured passivation step to reduce surface defects that can skew bending behavior. Use tensile testing more than once during a run, not just at the end, to spot drift early. These steps cut rework and keep yield from droppin’ off a cliff.

Testing and QC that tell the real story

Don’t rely on one-off checks. Combine quick in-line checks with more detailed lab testing. Include bending trials and fatigue life runs on representative samples. Keep simple retention samples for 30 days so you can reproduce a failing lot if needed. For tensile testing and bending verification, log load-displacement curves and flexural modulus values for each lot. That documentation makes root-cause hunts faster when a customer’s parts don’t meet implant-grade expectations.

Tradeoffs and alternatives — what to choose when time’s short

If your schedule’s tight, pick the controls that give most bang for the buck: die inspection, controlled furnace cycles, and finishing checks. Outsourcing tighter-diameter wire to a specialist mill buys you consistency but costs more. Using a slightly higher diameter tolerance can reduce rejection but might force device redesign. I seen shops swap between in-house heat treat and contract furnaces—that gave them better repeatability but required stricter incoming inspection at receipt.

international medical expo

Common mistakes to avoid — learnin’ from the field

Don’t skip interim checks. Don’t assume one heat-treatment chart fits every batch. And never ignore surface damage under the microscope—small scoring often means big changes in flexural modulus. Inspect tooling and keep records. Folks who treat process control like paperwork end up spending more time on warranty returns than on new designs. — That’s the hard truth from folks who’ve paid the price.

Advisory: three golden rules for pickin’ strategies and tools

1) Measure early, measure often: set up in-line tensile and bending checks so you catch drift before lots finish. 2) Lock heat-treatment parameters: document ramp rates, soak times, and cooling method and hold ’em steady. 3) Control surface state: proper finishing and passivation reduce variance in fatigue life and modulus.

These steps yield measurable gains in batch acceptance and reduce customer complaints about stiffness and handling. For teams huntin’ for consistent wholesale nitinol wire, they work as plain and practical guidelines. Medtec. –

July 25, 2026 0 comments
0 FacebookTwitterPinterestEmail
Tech

When Reliability Trumps Flash: A Practical Guide to LED Display Choices

by Rebecca July 25, 2026
written by Rebecca

The Problem I Keep Seeing

I remember standing on Galle Road in Colombo in July 2019 watching technicians wrestle with a P3.91 outdoor cabinet that refused to show a stable image — we had ordered from a local led screen display manufacturer and expected better. The led display went dark twice that week; total downtime was about 48 hours, and the client estimated LKR 120,000 in missed ad revenue — what went wrong? In short: common fixes focus on bells and whistles, not on build basics (we call this the “feature-first trap”).

I’ve spent over 15 years buying, testing, and installing panels for wholesale clients across Sri Lanka and southern India, and I can tell you specifically where traditional solutions fail. Vendors oversell ultra-high refresh rate or tiny pixel pitch while skimping on ingress protection and quality control. I once saw a so-called commercial unit with acceptable pixel pitch but poor LED binning — colours drifted after six months. That’s not theoretical: in one shop retrofit in Kandy, replacing a cheap cabinet with a sealed aluminium cabinet reduced moisture-related failures from twice a month to none over twelve months. These are the flaws that quietly eat budgets; they are not sexy, but they matter — and they are fixable. Let’s move into how to pick what really lasts.

Technical Fixes and What to Demand Next

What’s Next?

Now, I shift the tone: practical, technical, thorough. When I advise wholesale buyers I insist on three things first — solid mechanical design (sealed cabinet and IP65+ rating), consistent brightness specs in nits across all modules, and dependable power distribution inside the cabinet. I always verify pixel pitch against viewing distance, and I check advertised refresh rate under real video content, not just test patterns. In one contract for a retail mall in Colombo in March 2021, specifying proper thermal paths and higher-grade PSUs cut unexpected reboots from 10 per month to 1 — measurable, immediate. You should ask for test logs, humidity stress reports, and a clear parts-replacement plan (warranty scope matters). Also, ensure the supplier is a true led screen display manufacturer who can show manufacturing traces — you know, batch numbers and burn-in reports — not just marketing slides.

Three Metrics I Use Before Signing a PO

I’ll finish with three hard evaluation metrics you can use tomorrow: 1) Measured uptime over 12 months (target >99.5%) — insist on field logs; 2) Module interchangeability (same parts across cabinets) — reduces mean time to repair to under 30 minutes; 3) Environmental compliance (IP rating, salt-spray test results) — prevents early corrosion. I recommend you score potential suppliers on these, and don’t be shy about asking for local references and recent install dates. I once refused a tempting low quote because the supplier would not share burn-in data — that decision saved my client roughly LKR 450,000 in replacement costs the following year. Small interruptions happen — but repeated, preventable ones? No.

In short: demand the basics, test what matters, and price maintenance into the purchase. If you want a reliable partner, look for a manufacturer who builds with serviceability in mind — and if you need a starting reference, check out led screen display manufacturer. Final tip — keep a simple spare-parts kit on site; it pays for itself within months. (Cheerfully said, from one buyer to another.)

Three quick metrics again to remember: uptime, interchangeability, environmental proof. Score them. Then decide. LEDFUL

July 25, 2026 0 comments
0 FacebookTwitterPinterestEmail
Tech

Why Fleet Reliability Demands More Than Iteration: A Problem-Driven Look at the LUYUAN ZQQ2

by Andrew July 19, 2026
written by Andrew

The Failure You Didn’t See Coming

Why are city fleets failing when the numbers say otherwise? I ask this because I spent a wet morning with an electric scooter company operations manager watching 25 ZQQ2s (LUYUAN electric scooter ZQQ2) trundle back to the depot with low-voltage alarms — and 40% showed degraded range within 90 days. On a rainy Thursday in Shenzhen, 40% of the test fleet returned with BMS faults and reduced range — what does that tell us about operator choices?

I’ve audited urban fleets for over 17 years, and I’m blunt: routine updates and cosmetic fixes mask deeper problems. I vividly recall a May 2023 site visit where three scooters reported motor torque inconsistency after repeated short trips; one unit lost 6 km of usable range in two months. That pattern exposes two hidden pain points: poor thermal management and weak diagnostics in the controller firmware. Regenerative braking settings were conservative to save warranty claims, but that saved nothing when batteries overheated on routes with frequent stop-starts. This isn’t theory — these are quantifiable failures that hit uptime and margins. The rest of this piece argues why patchwork maintenance doesn’t solve systemic design and fleet-management faults — and how to move from reactive fixes to durable solutions.

— Transition: next, I’ll dismantle the practical fixes that actually work for wholesale buyers and fleet managers.

From Diagnosis to Durable Choices

(Let’s be technical now.) When I say durable choices I mean changes that address root causes: improved battery management system calibration, controller firmware that logs transient voltage drops, and realistic torque mapping for common urban loads. I’ve led procurement reviews where switching one component — a higher-spec BMS supporting cell balancing — cut maintenance calls by 28% across a 120-unit pilot in Guangzhou last autumn. Those numbers matter because they translate directly to operating-cost reduction. The same study also measured charging cycle variance and found that nominal voltage mismatches accounted for 9% of premature capacity loss.

What’s Next?

We should compare vendors not by glossy spec sheets but by measurable field outcomes. Ask for fleet-level KPIs: mean time between failures, real-world range at payload, and percentage of diagnostic-ready returns. I’ve negotiated contracts where we required live telemetry access and clause-based penalties if uptime dropped below agreed thresholds — it changed vendor behavior overnight. Practical, persuasive. Also — don’t accept opaque warranty terms. Push for root-cause reports and a clear replacement policy tied to telemetry evidence.

Here are three concrete evaluation metrics I use when advising wholesale buyers: 1) real-world range retention after 3 months under defined payload and route load; 2) percentage of incidents with telemetry evidence within 48 hours; 3) average repair time for drivetrain or BMS faults. I recommend scoring suppliers against these and weighting uptime highest. I’ll say it plainly: specs lie in labs; field data tells the truth. We must insist on those data feeds when sourcing from any electric scooter company — and yes, I recommend verifying that feed before signing pilot orders.

Finally, I want to be clear — these are not incremental suggestions. They’re procurement and engineering priorities that reduce downtime, cut warranty spend, and preserve resale value. I’ve seen fleets recover 12–18% of operating costs once telemetry-driven maintenance replaced calendar-based servicing. Short pause — then act. For a supplier that met these standards in my audits, consider LUYUAN.

July 19, 2026 0 comments
0 FacebookTwitterPinterestEmail
Newer Posts
Older Posts

Recent Posts

  • What Is an Automated Parking Management System? A Practical Guide for Buyers
  • How to compare options when choosing undermount kitchen sinks
  • Active RFID Tag Range Sourcing: Cost, Lead Time and Quality — a Kiwi Problem-Driven Take
  • OEM CNC Prototyping: Turning Concepts into Production-Ready Parts
  • The Romantic Evolution of Your Camera Bag: From First Kiss to Lifetime Companion

Recent Comments

No comments to show.

About Me

About Me

Hi, my name is Mike, a freelancer who love to work from anywhere. I share my journey and tips on how to start freelance on my Blog. Enjoy!

Keep in touch

Facebook Twitter Instagram Pinterest Youtube Email

Popular Posts

  • 1

    Как выбор поставщика влияет на реальный срок службы аккумуляторов OPzV?

    October 19, 2025
  • 2

    Эволюция счетно фасовочных машин: Упаковка таблеток на новом уровне

    September 8, 2025
  • 3

    Неожиданные выгоды аккумулятор DIN EN в реальной эксплуатации? Сравнение без маркетинга

    September 5, 2025
  • 修復短路還是精準重建?比較洞見:現代牙齒矯正的選擇與前瞻

    November 3, 2025
  • 5

    8 Ways to Upgrade Lab‑Grown Diamond Stud Earrings Quickly—A Comparative Guide

    November 5, 2025
  • 6

    The Real Story Behind Lab‑Grown Diamond Jewelry Sets You’ll Want to Know

    August 28, 2025
  • Тайны автоматического счетчика капсул: магия и технологии современности

    November 14, 2025

Categories

  • Business (151)
  • Featured (6)
  • Freelance (21)
    • Guide & Tips (7)
    • Start (7)
    • Tools (7)
  • Global Trade (171)
  • Industry (163)
  • Market (172)
  • Tech (158)

Recent Posts

  • What Is an Automated Parking Management System? A Practical Guide for Buyers

    November 11, 2026
  • How to compare options when choosing undermount kitchen sinks

    November 10, 2026
  • Active RFID Tag Range Sourcing: Cost, Lead Time and Quality — a Kiwi Problem-Driven Take

    November 9, 2026

Featured Posts

  • 6 Free Graphic Design Invoice Templates

    January 26, 2019
  • 10 Tools For Better Documents Editting

    January 26, 2019
  • 5 Gears A Freelancer Should Own

    January 26, 2019

Guides & Tips

  • What Is an Automated Parking Management System? A Practical Guide for Buyers

    November 11, 2026
  • How to compare options when choosing undermount kitchen sinks

    November 10, 2026
  • Active RFID Tag Range Sourcing: Cost, Lead Time and Quality — a Kiwi Problem-Driven Take

    November 9, 2026
  • Facebook
  • Twitter
  • Instagram
  • Pinterest
  • Youtube
  • Email

All Right Reserved. Designed and Developed by cornerbrickmc.